Show your product in the best light to increase sells online.
The importance of great product images for ecommerce.
This article is about why any online shop needs great product photography, how it can directly affect the sales conversions of your ecommerce business, and hence how you can do it properly – be it applying our product photography tips below on your own or with professional photographer’s help.
In this article you will find tips on:
- How to get the perfect product image to increase sales online
- Optimizing your product page with customer-friendly elements & features
As we have mentioned before on our Product Photography page, website photographs are essential for ecommerce businesses as they are the face of what you sell; the only way for your customer to see your product, judge its quality and design features.
Product photography is visual merchandising done online.
Appealing and detailed images can directly impact sales and returns. No, seriously – when your product can be seen in great details under all angles, you are effectively tackling all the doubts your online customer may have, and reassuring them with confidence to hit “Shop Now”, hence directly affecting your sales & returns! Same applies to offline shopping: a store’s presentation, atmosphere and tidiness can directly affect whether your customer will spend their money on your shop or not. Product photography is an art of retail; practically visual merchandising done online: the better your products are presented, the more likely they will sell.
If you are setting off to start any ecommerce business or online shop of any scale and size, and daring enough to do the product photography yourself (mind you: it’s not easy!), we do have a few tips to share. From preparing and executing the photoshoot, to effectively presenting your products online with web optimisation and utilisation of features, we as professionals can giveaway a few product photography tips!
Let’s begin with the trickiest part – the product-shooting process.
Product photography tips
How to present the items for selling
The idea of providing product images for your online shop is to make sure that your customer can see every side and every detail of your product without holding or seeing the actual product. With the product images, the customer should have a clear idea of what your product looks like with no second-guessing needed.
For the shots and angles of your product, here is a quick checklist you should cover:
- Front, side, back, top, bottom, and any relevant angle of the product
- Close-up shots to showcase your product’s features in detail
Considering you have to cover multiple angles and close-ups, the more shots you can take and upload, the better your customer can visualise the product. Let us take Burberry’s product shots as an example:
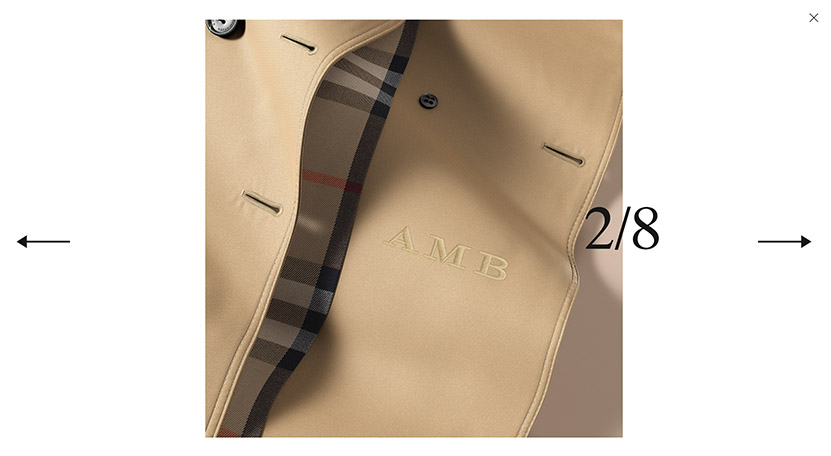 Close-up shot showing the inner lining and details of product.
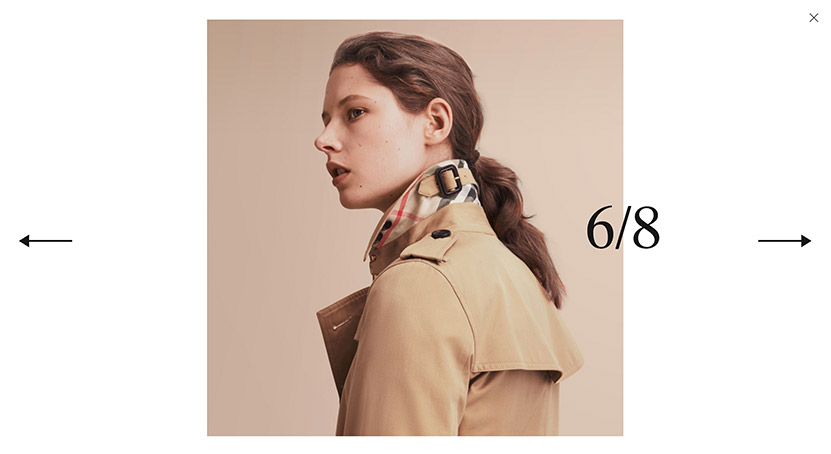 A close-up shot showing hidden features of the trench coat.
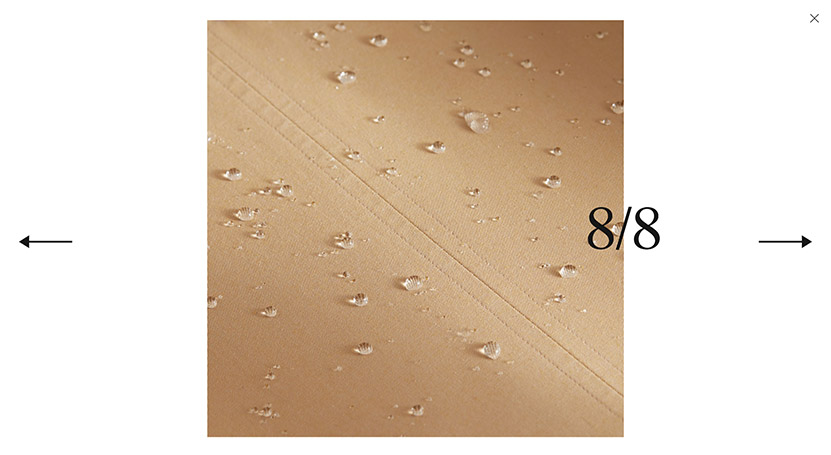 Here is a macro shot showing the fabric’s characteristics.
The close-up shots tells us that this trench coat has a print inner lining and water-repellent exterior. Close-up angled shots with context definitely give us a better idea of what the product is.
How to take the shots
One general rule that is applicable to all product photography shootings: always use professional cameras to get good quality and high-resolution/clear images. Lighting is also a decisive element that determines the quality of your images: studio photoshoots paired with professional flashlights usually work best and shows the item in its best light. However, generally speaking, professional photography itself is a big subject. If you really want to go into details and get technical tutorials on this, you can read more from ecommerce and web design platforms like Shopify or Wix.
What to prepare for a photoshoot
Preparation of the product is just as important as the shooting itself! Before the shoot takes places, make sure that your product is clean, tidy, or even polished to its best form. If you are shooting clothes, make sure to steam them beforehand to reduce creases on the garment. If your product is reflective or can easily catch fingerprints, make sure to have a micro-fibre cloth with you to rub off any last minute fingerprint or dust. This will make the retouching process a lot easier.
Props and models might come in handy for your photoshoot. Often, by giving a context of your product – when, where, how your product can be used – will give your customers a reason to shop. For example, you could compare tiny products with the sizes of coins, or test the capacity of a diaper bag’s compartments by stuffing in baby products. If your product serves multiple purposes, such as an inflated sofa that can be served as a beanbag or a beach sunbathing spot, try to portray your product in different situations and suggest ways of usage to your customers with product images.
Retouching
The key of retouching is to remove imperfection without distorting the product. You want your product to look clean and tidy, but not giving it a makeover. As an ecommerce seller, your online credibility is crucial to your business. Keep your image true to the product’s original form. Over-editing the image might mislead your customer and end up buying something different from what they want. This can potentially generate bad reviews, increase returns and exchanges, which can damage your brand’s reputation and your product’s trustworthiness.
For the image retouching process, there are mainly two things you should focus on:
- Background: maintain colour consistency on all shots (especially when multiple shots are shown on the same page e.g. Product listing page)
- Dust removal: keep your product clean by removing any dust on the product’s surface
- Remove any imperfection without altering your product
That said, creating such images requires skills, professional gadgets, as well as a well-equipped studio, which could be logistically challenging and very time-consuming. To save you from all the troubles, Digital Candy provides a one-stop web design, web development with website product photography service in Hong Kong at an affordable price. Click here to learn more about our Product Photography services.
Optimizing your product page with user-friendly elements & features
Now it’s time to make your perfect images into use! With good web design and optimized use of product images and web features, you can further enhance your customer’s user experience and visually convince them that your products are worth buying.
Here are a few elements we recommend implementing:
Provide high resolution and clear images
Studies and A/B tests have shown that bigger product images bring higher conversions. It also makes sense – bigger images are generally more visually impactful. This will allow your customers to take a closer look at your product.
Enable image zoomable features
The zoom feature is basically a must for ecommerce. Customers do have to see the product in full details to be able to decide whether they like and want to buy it. Zoom by hover is still widely used, though you may have to consider that zoom features may not be applicable on mobiles or touchscreen tablets, meaning that your image should be large enough itself to serve as a zoom-in view. Alternatively, we recommend using full screen lightbox (pop-up) feature as it is easy to use on all device. The choice is yours, but we recommend testing both features to see which converts best on your website.
Product page features and layout
To give your customer a better online shopping experience, you may even want to make a product video (article from econsultancy.com on the subject). This way, your customers can enjoy a full 360 view of the product as if they were holding the product in hand and inspect every detail. Also, from a web user-experience perspective, they may have fun playing with the interactive features on your website :D.
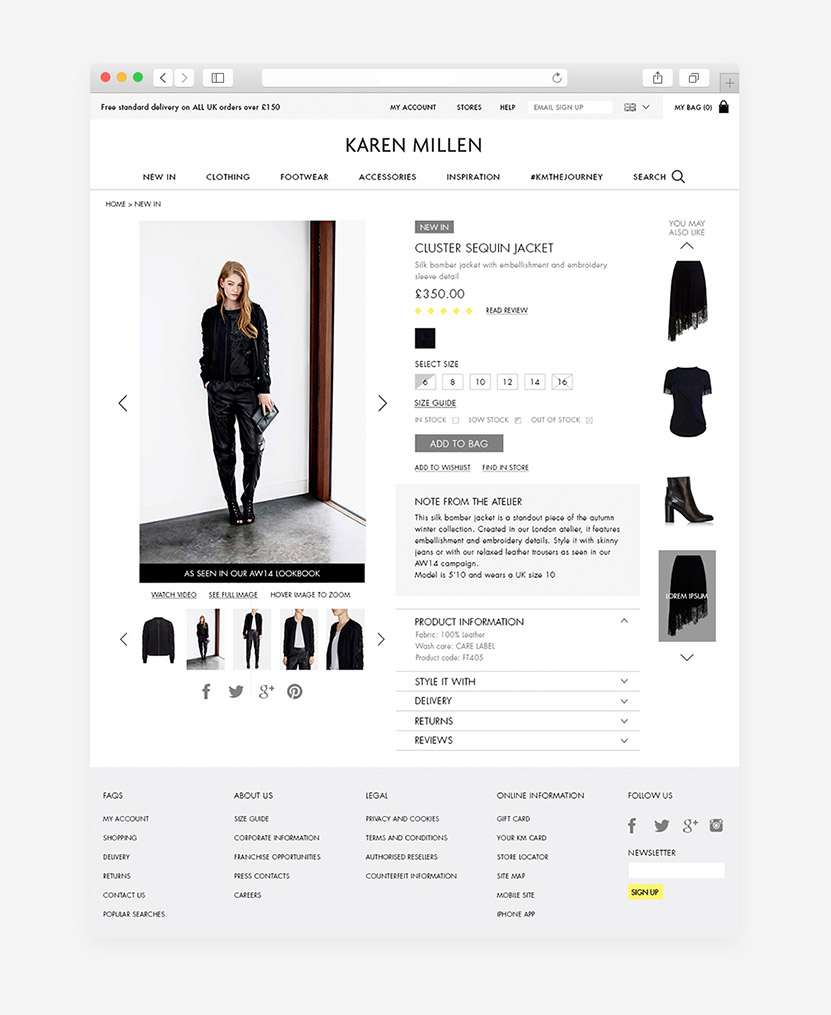 An example of Product Page Layout.
Add photos taken by your customers and mood shots on your product page
As much as we have been preaching about high-resolution professional product shots throughout this article, in some cases adding one or two amateur photos from your fans can be a good idea, too! These add a bit of a homemade feel and authenticity to your product. Plus, modelling your product and showing what it looks like in real life can be beneficial! Likewise, you may want to try Shop via Instagram, which we will further explain below.
Resolution and image size
Optimise your images with the lightest image file yet highest resolution and quality as possible. This is crucial as it directly affects your page load time, meaning it will also affect your website’s user experience, and eventually your SEO performance due to bounce rate and visitor’s session duration. For that reason, you want to keep your file size small and ensure that your website is loading fast, but you also don’t want a low-resolution product image that hinders your customers from seeing what the product! Keep your zoomed images’ minimum resolution at 1500px * 1500px, but also try to strike the perfect balance between the two. You could also load smaller images on the page and load larger files later on for the large ones.
In order to keep your images light, your files should be ‘saved for web’ (in photoshop) or be compressed using tools like Tinypng.
Try “Shop via Instagram”
Did you know you can ‘shop via Instagram’ from your website? Develop or implement scripts which let you add item tags to the photos from your Instagram feed. That way, while scrolling Instagram feeds, your followers can shop what they see. Your Instagram posts can also serve as product images while driving sales and traffic to your ecommerce platforms. It’s relatively easy to setup and it offers another way for your customer to discover your products.
Let your user shop from your Instagram feed.
Make photos pinnable
It is apparent enough that the power of social media should never be underestimated – word of mouth and spreading information can possibly make your brand a household name! Apart from making your product shareable on Facebook and Twitter, make your photos “pinnable” so it can easily be saved by the good design hunters! 1 click on the Pin-It button and you have an extra link to your product page! Note: the main audience on Pinterest is the US and the UK.
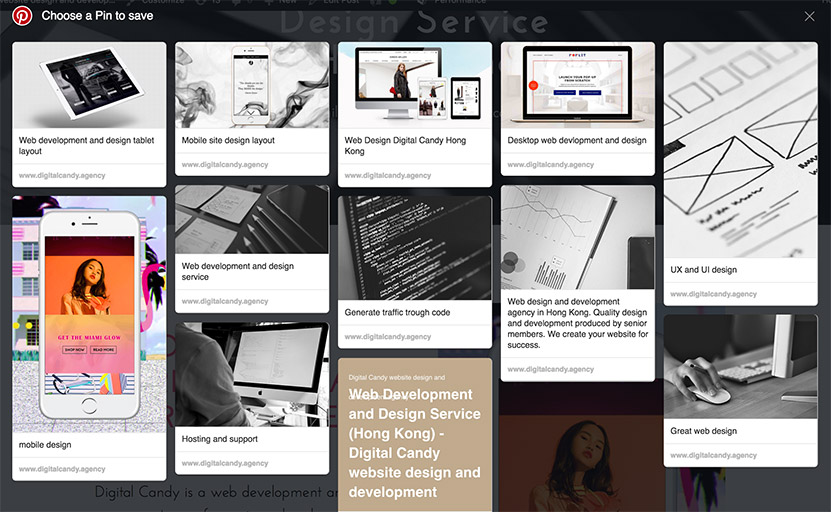 Preview mode of the Pinterest “Pin-It” Lightbox.
Should you need assistance on developing shop by Instagram, “Pin It” Button, image optimisation, content upload, or any other web maintenance services. Our product photography page is here and you can contact us directly.
You can also follow us on social media where we share other tips and updates: Facebook, Google +, Twitter